Get started with AWS cloud and launch your first EC2 instance !
Search for AWS Free tier account on google and launch the AWS website — Free Cloud Computing Services — AWS Free Tier (amazon.com)

Click on “Create a Free account”. Provide credit card details and finally submit the details

You will get a Congratulations message. Click on “Go to AWS management console”

Once login on the AWS Management console -

You can see the list of all AWS services –

Let’s launch your first EC2 instance. Click on EC2 under Compute section of list of services.

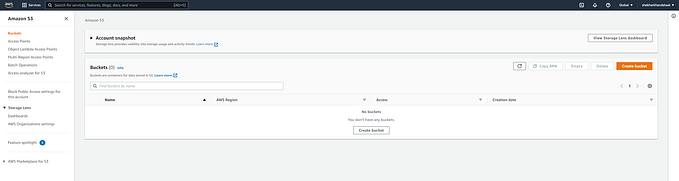
Initially, there are no instances launched/running. Click on “Launch Instance” button. It will ask you to select the instance configuration from a list.

Select further configurations and “Review and Launch”.

Review the details of the instance and click on “Launch”.

A pop-up to create/select the public key will appear, where you need to either create a new key-pair or select an existing key-pair. This will be required to ssh into the server.

Select “Create a new key pair” and provide a name to the key-pair. CLick on “Download Key Pair”.

Save the “pem” file on your machine. And finally click on “Launch Instances”.

Wait for few minutes, and you will see the lauch status as “Success”. Click on “View instances”.

You can see the instance is up and running.

Click on Instance ID, and you can see all details of the instance.

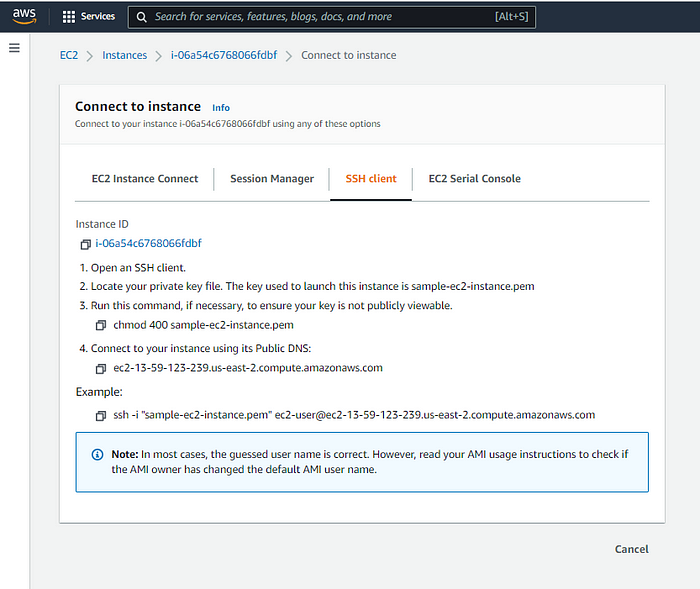
Click on the “Connect” button on the right upper pane. This will give you public ip of the instance and few more details. Note the ip address of the server and the user name.

Click on “Connect” button, it will ssh into the server on the browser itself.

Click on “ssh-client” and it will give you details of how to ssh into the server using a ssh-client like “putty”.
Lets try to connect to the server using putty. First open PuTTYgen tool.

On the tool, you can either create a new private key, in that case the public key of your laptop will be used. But on our case, we need to create a private key for ec2 instance public key. Hence, click on “Load” button and select the pem file downloaded from EC2 instance in previous steps.

Browse to the location where you have saved the pem file and select.

Once selected, see the success message and click ok.

Further, click on “Save private key” button.

Provide a name and save the private key on your machine.

Once done, open putty to ssh into the server. Insert ip address/host name of the ec2 instance, and click on “SSH->Auth” option in the left pane.

Browse the private key (ppk) file saved in the prvious step, and click on Open button.

During first time ssh into the server, you will find this message, click Yes.

Putty will ask to enter the user name. Provide user name and press enter.

Password-less authentication, using private key authentication will happen and you will be able to ssh into the ec2 instance using putty.

Happy Learning.